Angle/miter cuts
To enable the angle cuts feature, follow these three simple steps:
1) In the configuration settings, enable the Angle/miter cuts switch.

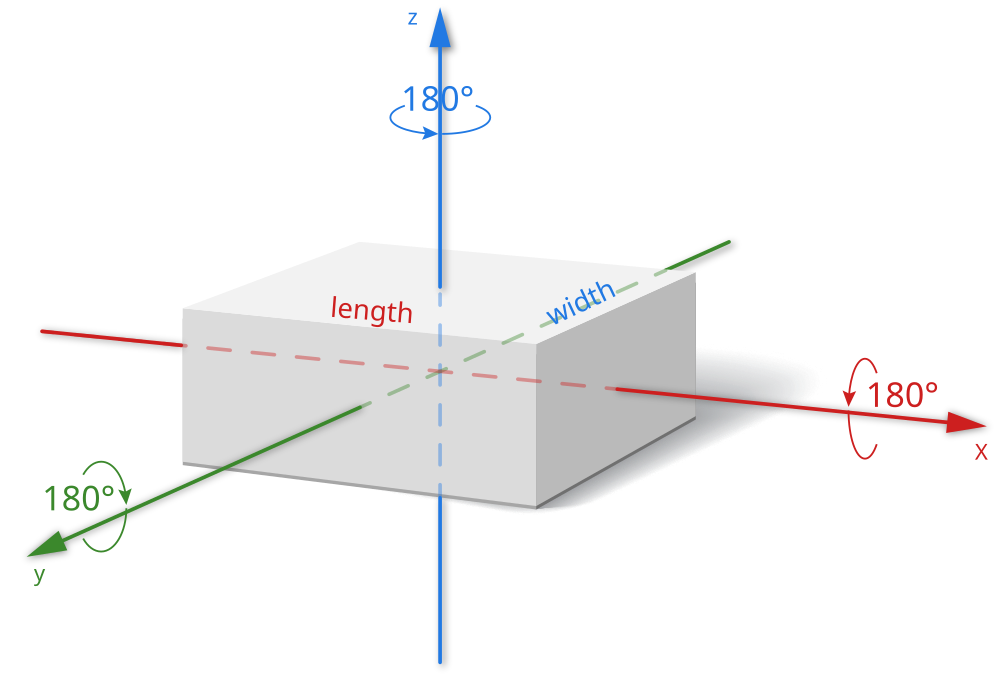
2) Fill in the fields Width and Axial symmetry. To correctly calculate the orientation and placement of parts with angles, we need to know the width of the material and the axial symmetry of the material.

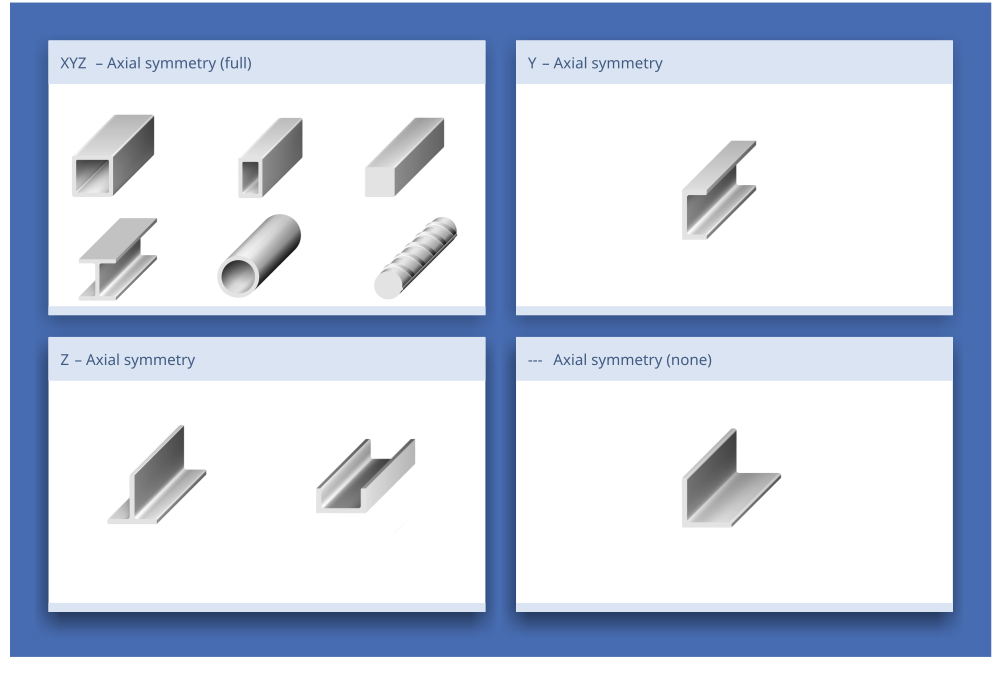
The following figure shows the most common shapes of materials and their corresponding axial symmetry.
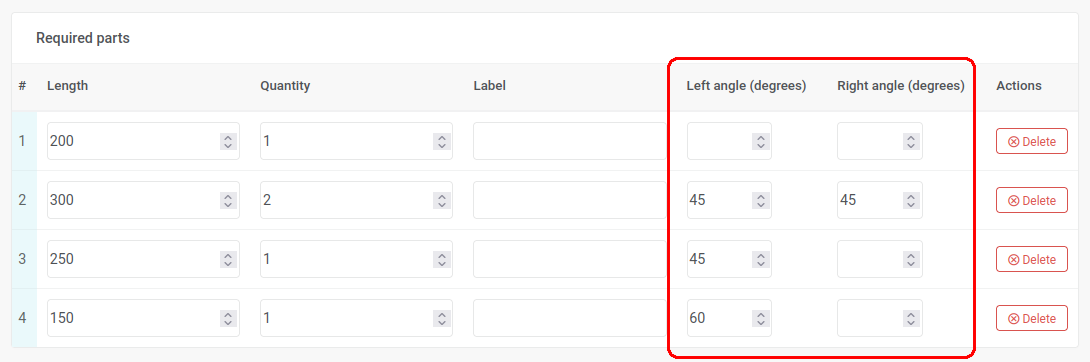
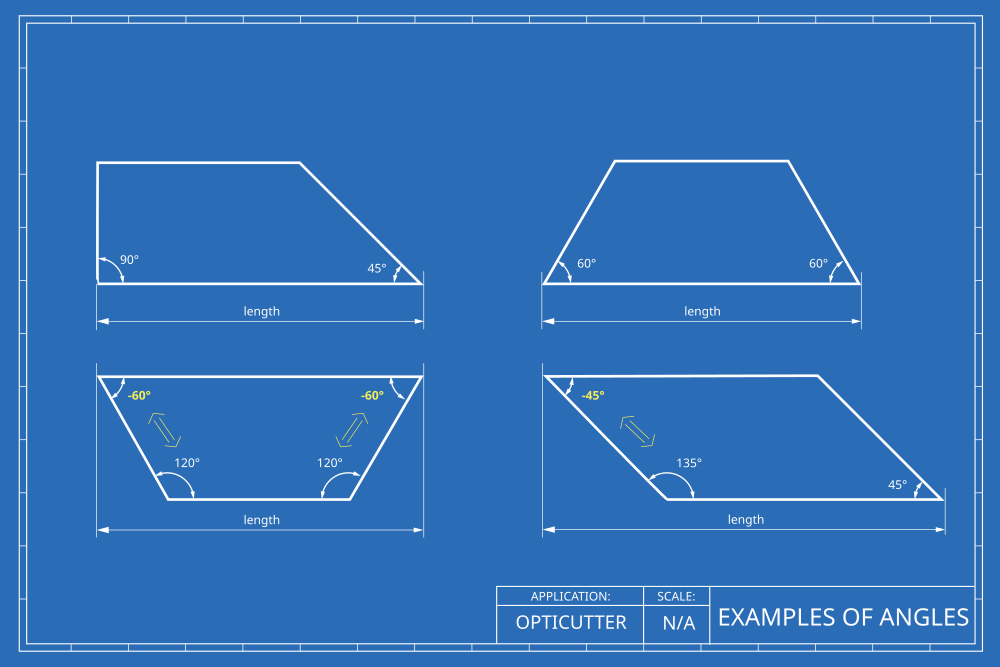
3) Finally, enter Left angle and Right angle for each desired part that you want to cut at an angle. The minimum allowed value is 10° and the maximum value is 170°. If one or both angles are right angles, you can leave the field blank or enter the number 90.
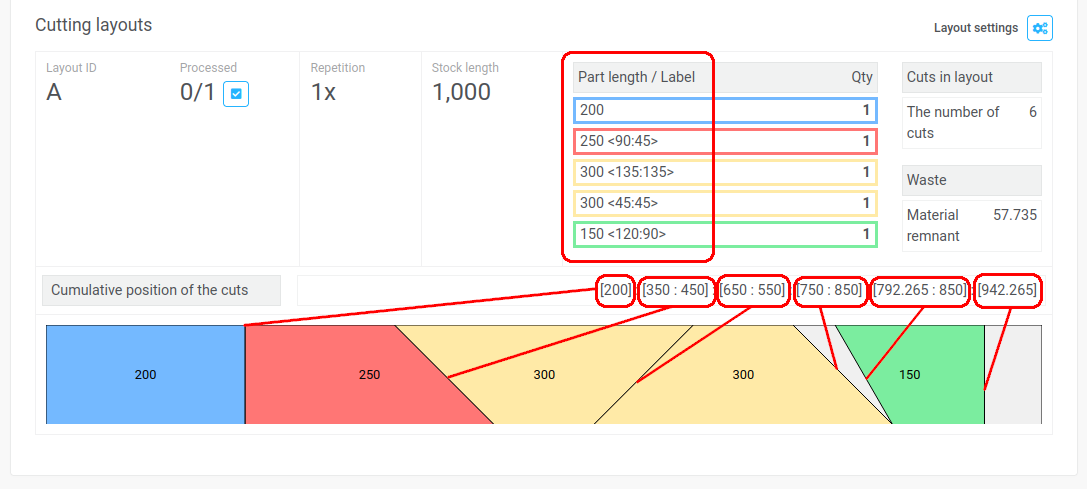
Solution
- The solution shows a complete layout with the exact location and orientation of each part.
- The part list for each layout includes the length of each part as well as the left and right angles (in angle brackets).
- The cumulative cut position shows the position of each cut that needs to be made. The first number in each square bracket indicates the top position of the cut, the second defines the bottom position of the cut. If the square brackets contain only one number, it indicates a perpendicular cut (the top and bottom positions are the same).